
Recording music used to mean booking time at a professional studio, saving money, and hoping for a few good takes before the clock ran out. Today, the picture is completely different. Musicians, podcasters, and creators across the United States are turning spare bedrooms, garages, and even closets into creative workspaces. With careful planning, smart choices, and a bit of patience, it’s entirely possible to build a home studio that sounds professional without spending a fortune.
Start With the Space You Have
The best home studios don’t necessarily start with expensive gear — they start with the right space. Before buying anything, it helps to look at what’s already available. A small, quiet room with minimal outside noise is ideal. Hard, reflective surfaces like tile or glass can make sound bounce harshly, so many people use rugs, curtains, or fabric wall hangings to soften the acoustics.
A closet full of clothes can double as a surprisingly good vocal booth. Heavy curtains or foam panels on the walls help reduce echo, but even simple steps — such as positioning your microphone away from windows and corners — can make a noticeable difference. The goal isn’t to make the room silent, but to control how sound moves within it. A little trial and error goes a long way.
The Core Setup: Computer, Interface, and Microphone
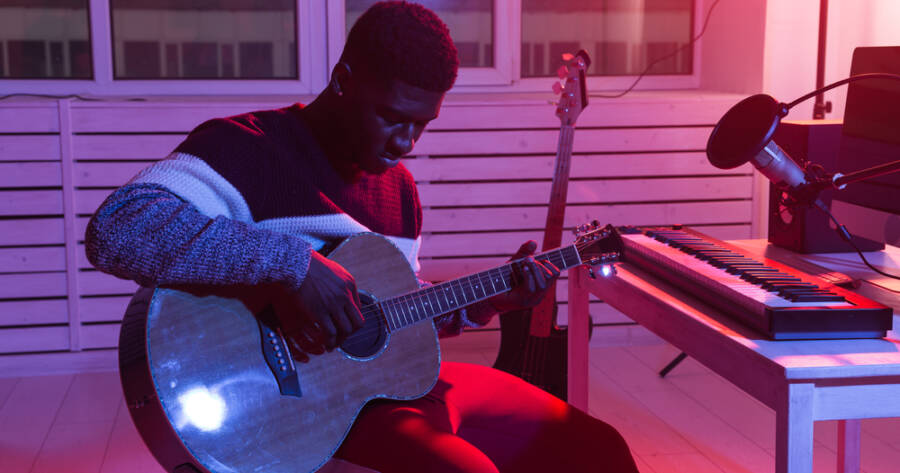
A home studio doesn’t need racks of gear to get started. At its heart are three essentials: a computer, an audio interface, and a microphone.
Most modern laptops or desktops can handle basic recording software, known as a Digital Audio Workstation (DAW). Popular options like Reaper and Audacity are inexpensive or even without fees. Once installed, the DAW becomes your central hub for recording, editing, and mixing.
The audio interface acts as a bridge between your instruments or microphones and your computer. Even entry-level models now deliver clear, low-noise recording. For vocals and acoustic instruments, a condenser microphone provides detail and warmth. Those recording louder sources — like electric guitars or drums — often prefer a dynamic microphone, which handles higher volumes and background noise better.
These basic tools form the foundation of your studio. You can always expand later, but with these three pieces, you can already create broadcast-quality sound in a home environment.
Monitoring Your Sound
Accurate monitoring is essential for mixing music or editing voice recordings. Many beginners start with headphones, and that’s perfectly fine — especially if you’re working in a shared space. Closed-back headphones help isolate sound, keeping your recording environment quiet.
Studio monitors, or reference speakers, are another option once you have a dedicated room. Unlike consumer speakers that boost bass or treble, studio monitors aim to deliver a flat, balanced sound. This helps you make mixing decisions that will translate well on other systems, like car stereos or earbuds.
Even if professional monitors aren’t in the budget right away, learning to mix with what you have is part of the process. Over time, you’ll learn how your setup sounds and how to adjust your mixes accordingly.
DIY Sound Treatment and Smart Additions
Soundproofing and acoustic treatment are often misunderstood. True soundproofing — keeping sound from escaping a room — is expensive and complex. But acoustic treatment, which controls reflections and improves clarity, can be achieved affordably.
Foam panels are widely available, but everyday items can also help. Bookshelves filled with unevenly sized books act as natural diffusers. Thick rugs or blankets reduce unwanted reflections from floors and walls. Many creators even build simple “reflection filters” around their microphones using foam and cardboard to block unwanted noise.
A good pop filter is another inexpensive yet essential tool for recording vocals. It reduces harsh “p” and “b” sounds that can overload a microphone. And for anyone using electric instruments, a small audio mixer or MIDI controller can expand creative possibilities without large investments.
The Power of Learning by Doing
The most valuable resource in any home studio isn’t a microphone or a piece of software — it’s time spent learning. Each recording teaches something new: mic placement, gain levels, EQ balance, or the importance of silence between takes.
Online tutorials, community forums, and recording courses can help, but experimentation is often the best teacher. Many professional producers began exactly this way, using modest gear in spare rooms and upgrading slowly as their skills and needs grew.
Creativity Over Cost
Building a home studio on a budget is less about what you buy and more about how you use it. With a quiet space, a few reliable tools, and a willingness to learn, anyone can create music or content that sounds polished and personal.
The process rewards creativity and patience over spending power. Each improvement — a clearer vocal, a better mix, a cleaner sound — reflects growth. Whether you’re recording songs, podcasts, or sound design, the most important part of any studio isn’t the equipment — it’s the person sitting behind it, pressing record.